

Digital Environments: Project 1 Summary
- Blake Hennigan

- Sep 11, 2019
- 3 min read
Original:

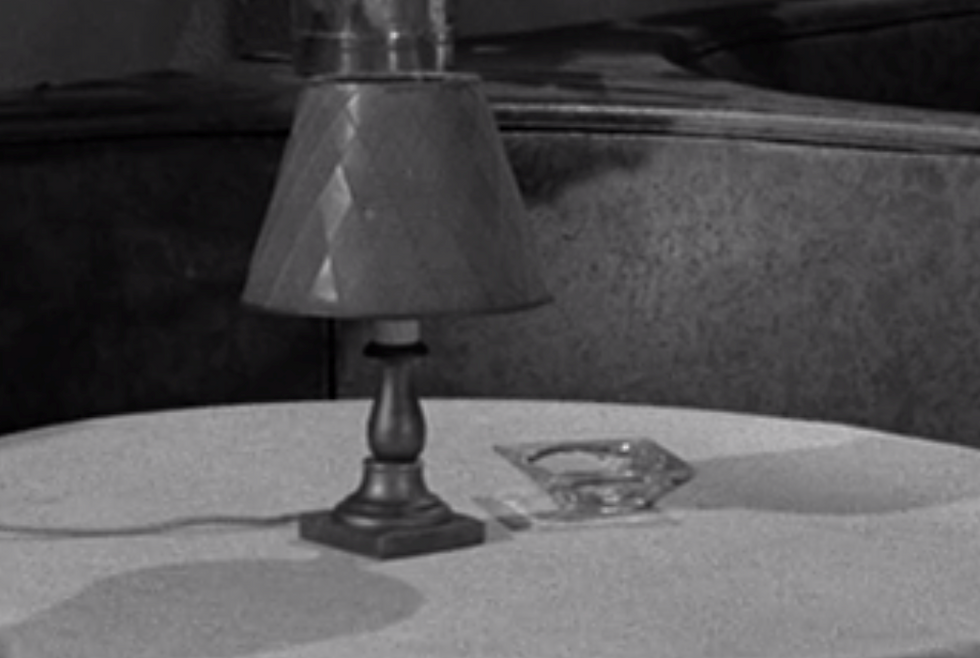
Rendered:

Photograph:

The objective:
the purpose of the project is to take a shot from a movie (1950's or before), and digitally recreate that environment in 3D. The other stipulations of the project is that we are only allowed to use NURBS to create out assets, and that we insert this digital scene into a photo that we ourselves go out and take.

The scene that i have chosen to do is from The Twilight Zone (season 1, episode 33). I picked this scene because it had multiple angles of the same set piece, which allowed me to get better reference for my modeling stage. The initial list of assets that i had made are as followed:
Lamp
Table Cloth
Couch
Plant
Picture Frame
Light Fixture
Chandelier
One particularly useful, free, asset I had was feeding in my reference images to an AI upscaler ( https://deep-image.ai/application/ ) . This allowed me to get more resolution out of my images so that when i modeled, i was more accurate with detail work.


Another aspect I began working on was getting my background image taken, along with a corresponding HDRI of the environment. Because my reference image does not have a ceiling or a floor shown in the photo, I had an easier time finding a spot to take my image (I just needed a corner with harsher lighting).


I settled on the art gallery at the MSC which worked out perfectly lighting wise for my image. One aspect that also helped was shooting my image in black and white so i could see how the color would affect the values. Sameer and I rented a 360 camera from the 4th floor so that we could take HDRI's of our images we find to match. It turned out pretty well!
Moving on, I began to model my scene. the biggest challenges were modeling the chandelier and the light fixture, but for the most part, my scene was fairly straightforward.
Here are various modeling updates throughout the whole project:


Tuesday night i made a lot of progress modeling my environment with still some more modeling left to do. In class critique helped me see things that I couldn't see on my small monitor. The biggest offense I was that the coach sofa, ( the square trim) needed to be curve.
One huge problem that i ran into on this project was texturing. i was able to make some my textures in Substance designer and move them over for some of my assets but for others, i was having huge issues with the UV's, and without any way to project the UV's, I was stuck going through the render man hyper shade, hooking up a 2DManifold, and stretching the x and y manually. in some cases, the UV's were unusable. luckily enough, I could get by fairly well without relying too much on texturing, because my scene is a rather clean setting.


After getting my textures and modeling done, I began to work on lighting for my scene. My main guide for lighting the scene was observing the table lamp shadows. they gave me a clear indication of where my predominant light sources would be. i also had the HDRI still on in the background, just turned down a touch.
After setting up those initial light sources i began to put in my fill lights and various sources to match up better with the picture as close as i could. The image I chose relies heavily on shadows and contrast, so matching the photo in that regard, is key.
After going through and matching the lighting, I created a shadow occlusion pass which I used to comp in the shadows on the wall.


finally, after combining the shadow pass, adding a black and white filter to my render, and turning up the contrast of the whole image the end product of Assignment 1 is:

IN CONCLUSION:
I learned many things from this project, mainly being NURBS and how and where they should be used, if implemented into a project. I also began to learn that i like environment modeling more than I would have expected.


Comments