

Digital Environments Group Blog-Mt. Vernon Place United Methodist Church Interior Recreation
- Blake Hennigan

- Dec 9, 2019
- 10 min read
Task: Recreate and render a cinematic of the Mt. Vernon Place United Methodist Church Interior
Subject: Mt. Vernon Place United Methodist Church
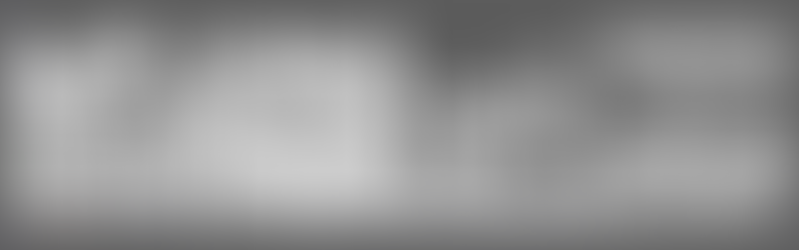
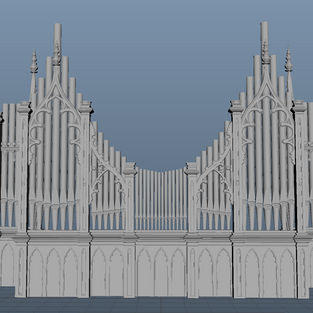
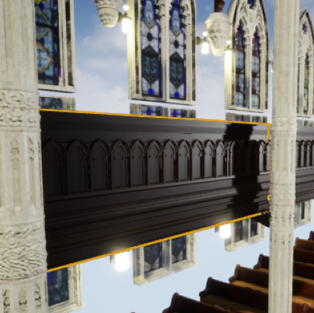
FINAL IMAGE/VIDEO

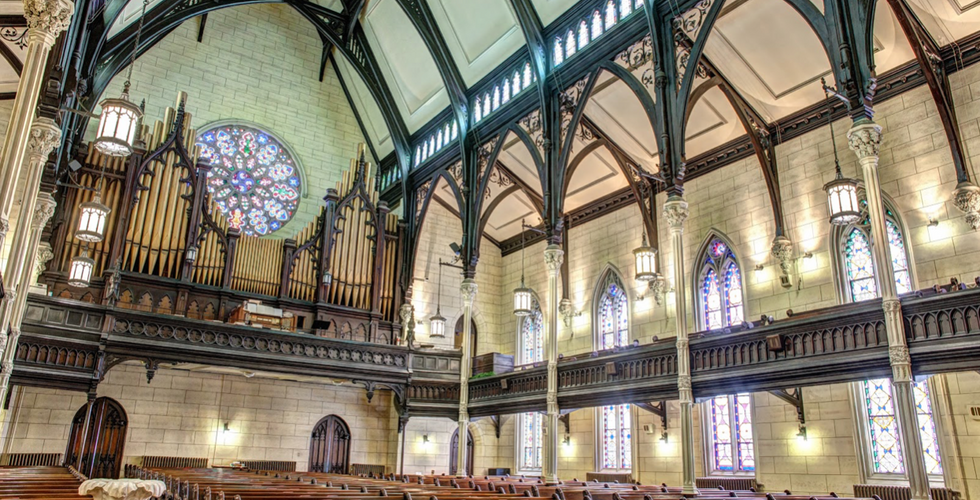
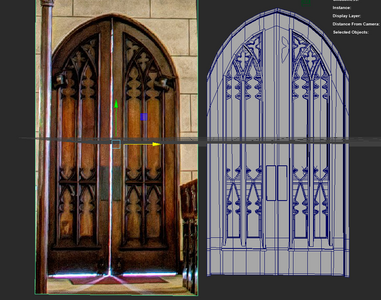
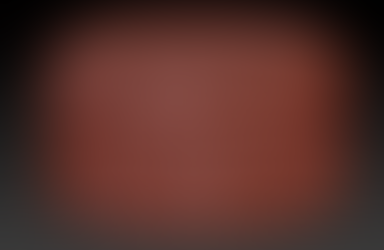
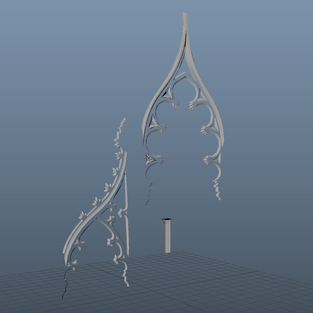
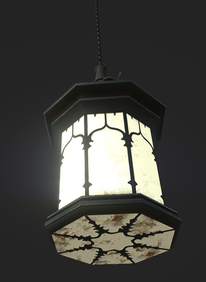
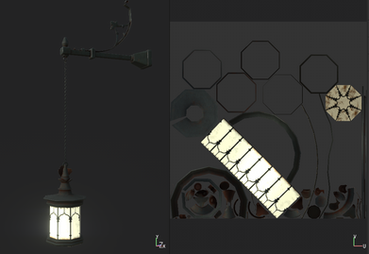
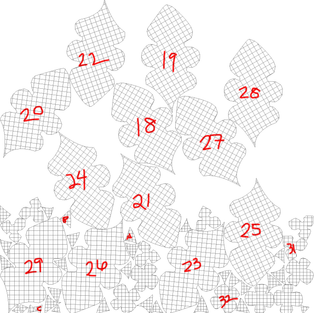
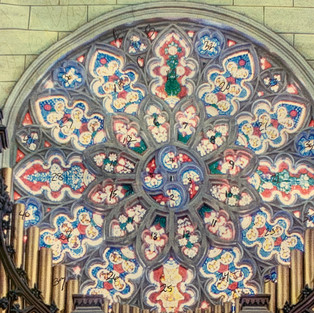
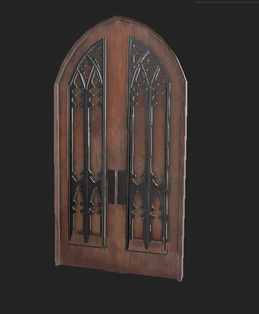
REFERENCE IMAGE

Members: Sara Wild, Abby Henning, Blake Hennigan, Carmen Sims
APPROACH:
Modeling: Maya, ZBrush, Illustrator
Texturing: Substance Painter, Photoshop
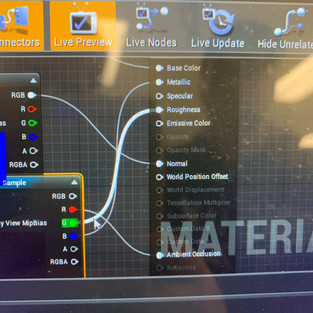
Lighting: Unreal Engine 4
Render: Unreal Engine Sequencer
MEMBER ROLES:
Sara: Unreal/Perforce Manager, Modeling, Texturing
Abby: Modeling, Texturing, Lighting
Blake: Modeling, Texturing, Lighting
Carmen: Whitebox, Modeling, Texturing
Sara set-up Perforce (our version control system with AWS), taught everyone how to use it, and set-up level streaming. She also created cameras and the level cinematic through the sequencer. Carmen created the whitebox.


PART I, MODELING:
Everyone:
Collectively split assets to model
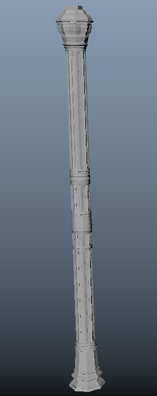
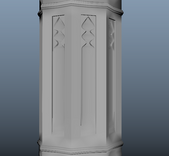
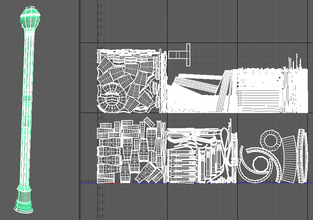
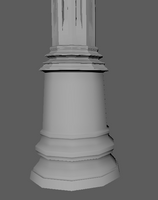
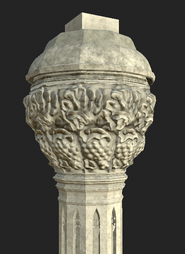
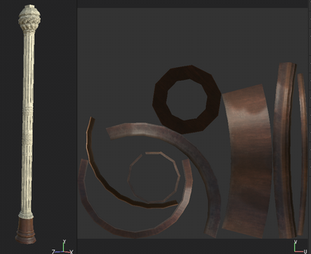
Sara: Columns (model+sculpt), decorative concrete sconces (model+sculpt), UV-ed organ, UV-ed hanging lamps
Abby:Bottom and Top “Metal” Arches, All of the stained glass windows, Molding, Hanging Chain Lamp
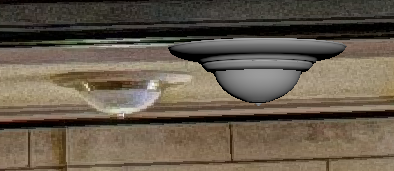
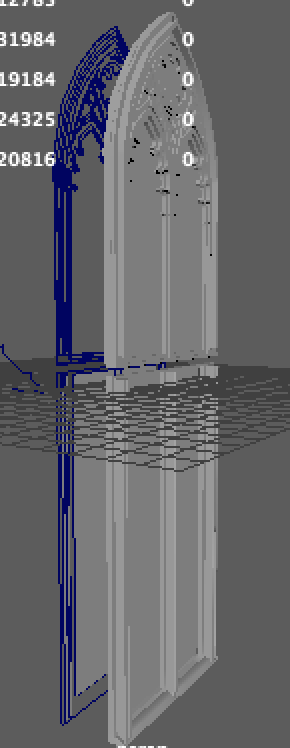
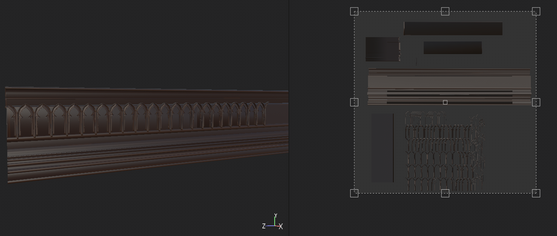
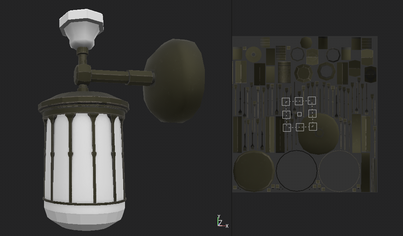
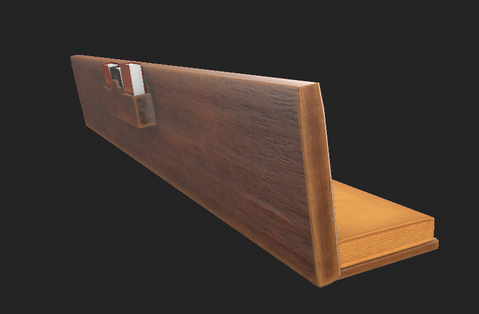
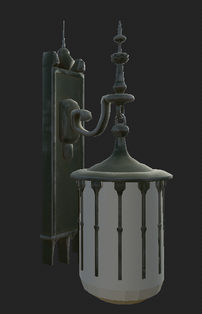
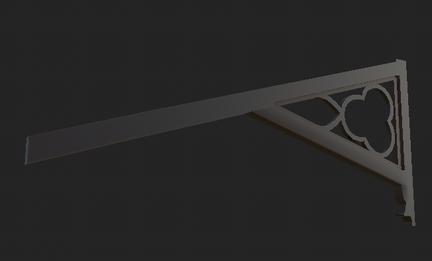
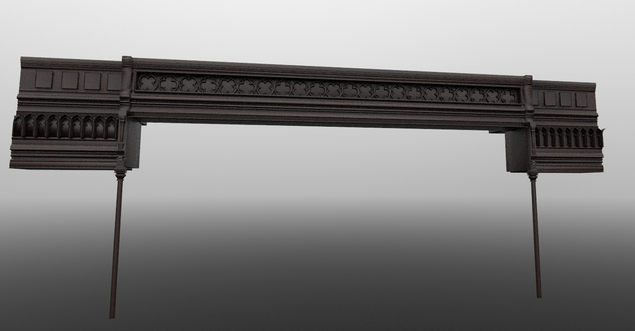
Blake: Second Floor Design Trim, Church Pews, Outer Doors, Inner Doors, Front Balcony Molding, Lower Floor Arches, Upper light fixtures, Lower Light Fixtures
Carmen: Whitebox,
Specific Member Contributions:
Blake:
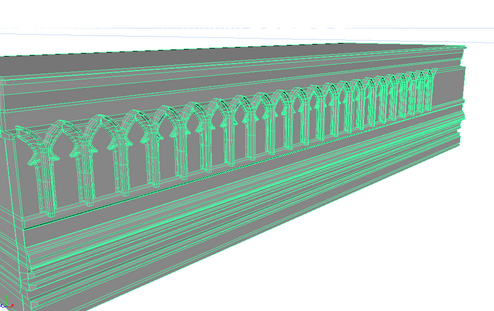
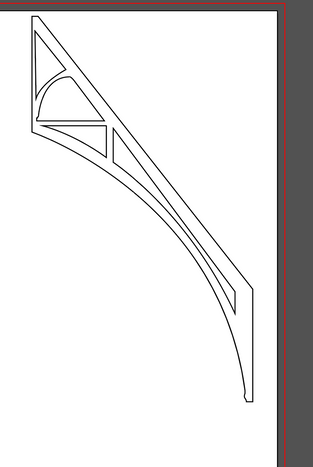
Second Floor Design Trim: for the trim of the balcony, I used a single nice frontal reference photo to create most of my modeling. My main approach was using nurbs for detailing and poly modeling for the base and layering trim.
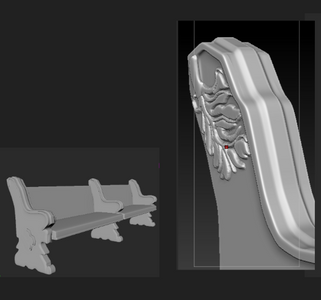
Church Pews: the church pews were the assets I spent the most time on and im happy with how they came out. My main approach was to make my low poly, sculpt the details in zbrush, and then texture and bake in substance. My biggest challenge was that I couldn't get a good reference photo, so a lot of the detailing had to be drawn out and planned. the church pew is broken down into the side arms and the middle bench. along with that there's a slot with textured books on the back, ended up not being shown from the camera angle we fixed on.
Outer Door: was also one of those assets where I couldn't get a good reference for so some details needed to be created. nurbs and Polys used the most.
Inner Door: had a clear unobstructed reference so the modeling was straight forward. mainly constructed with polygons but some of the metal workings were done with nurbs.
Front Balcony Arches: Used front reference to get the basic shape and details. modeling done with nurbs. I found a couple of different angles to get the specific thickness correct.
For the lower floor arches, I had to be careful about proportions and scaling, as the ceiling is supposed to fit in with the arches. Using a reference photo that Carmen’s Dad took, I was able to get a pretty good view of the shape of the arches. Done with polys.
Upper Wall Light Fixtures: stitching together a bunch of reference photos I was able to get a clear front and side view of how the light fixture looked. the trick was to make sure the emission portion and the metal frame were on different uv sheets so setting up in Unreal would be easy. both nurbs and polys used in creation.
Lower Light Fixtures: Were slightly more detailed than the upper lights, but had a good amount of reference. done mainly with nurbs and some polys.
Roof Lights: Roof lights were done with polys. Not really seen as much, but picked up because they were still in the scene.


Sara:
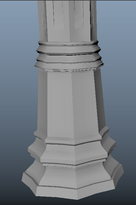
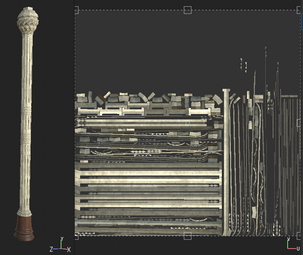
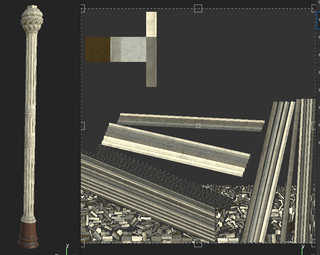
Columns: The columns are the asset I spent the most amount of time on. Because they are such an integral part of the structure of the room, I had to get their proportions very close to reality. I started over more than a few times due to feedback and realizing something wouldn’t work. I chose to model the column one side at a time, so I could then rotate it and merge the edges to create a full column. Initially, I made the mistake of thinking that the column only had 8 sides because I could only see 4 sides at a time, but Andre deftly pointed out that there must at least be 10 sides because you wouldn’t see the two perpendicular to the camera. I then had to start over with a single side and merge edges again. Due to the severe verticality of the model, I chose to UV the column with multiple UDIMs so I could get more texture resolution on it. To make the sculpted parts, I made a low poly version of each section that matched their side profiles roughly and imported to ZBrush. From there, I simply divided the mesh and sculpted the detail, dynameshing as I went.
Decorative Wall Sconces: To make these, I combined the top of the column with a smaller version of the sculpted top part and a small bevel in between. I also created this with multiple UDIMs.
UV-ed Organ: I picked up doing the organ textures from Carmen while she created a more finalized walls+ceiling. I discovered that the UVs were overlapping and some were not mapped, so I had to redo the UVs. Carmen originally had them placed out on 3 UDIMs, but I chose to do them in 4 because the organ is such a center-piece.
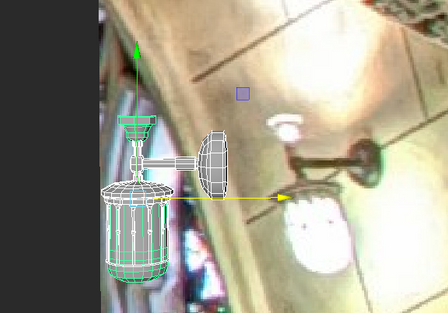
UV-ed Hanging Lamp: I also picked up texturing the hanging lamps from Abby so she could focus on other things. When importing to UE4, the mesh had blacked-out and invisible faces. I managed to fix some of them by redo-ing the UVs, but we still had problems with it for hours after. It wasn’t until Abby tried making the chain links bigger that they actually displayed properly in UE4.


Carmen:
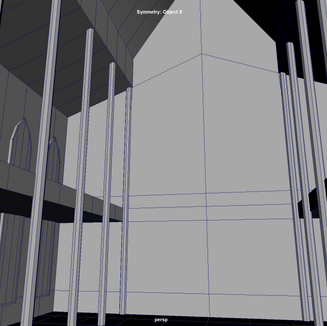
Whitebox: Using reference images from the site as well as a top view from google maps, I made a whitebox with simple main shapes to get everyone started. I added in proxy geometry for where the windows, pillars, and balconies would go. As we modeled assets, I adjusted them to fit our correct proportions so it could be re purposed into the final walls for our church
Organ: This was a difficult asset to create. The organ was so central to our design and it needed to be well-modeled. I hadn’t modeled such an intricate object before. Using a method Abby showed me, I started by tracing the curves and indents of the wood carvings in illustrator, to create bezier curves. I then imported them into Maya in order to create lofted NURBS surfaces. I converted these into geometry and started to use them as a basis for the rest of the organ design, specifically it’s columns and lower half. I found that the design used a lot of repeated motifs, so I was able to use that to my advantage when modeling.
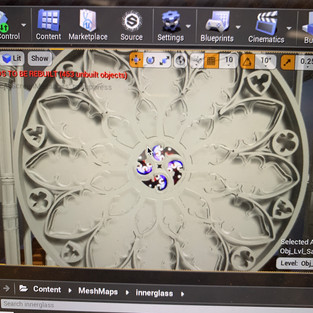
Final Walls and Ceiling: Using the whitebox from earlier, I took everyone’s final assets and created the final walls for our scene. This took a lot of back and forth between Unreal and Maya, as we needed our assets in the scene to match up to the indents that were made for them in the walls, and vice versa. I also created repeatable ceiling tiles for the underside of the balcony and the roof of the church. We actually discovered a few layout issues this way and were able to avoid them.
Upper Windows: Not a very big asset but needed to be picked up, I reused some geometry from the bottom of the organ to make the window shapes, since they were fairly similar in design. I also picked some of the wooden moulding Abby had made as a base for the moulding around the windows.


Abby:
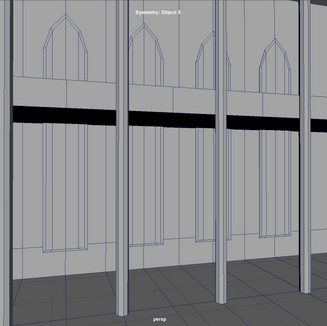
Side Windows: I took a reference image, distorted it in photoshop to make it look straight on and traced one have of it in illustrator curves. The curves were mirrored to give it the complete shape and Through a series of layers I turned each filled curve space into a poly mesh that was then extruded. This was the basis of most of my modeling.
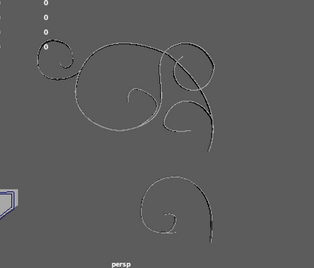
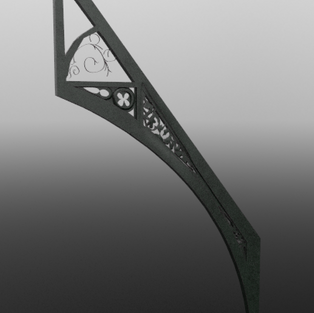
Floral Iron Arches: These were originally modeled in the exact same mode as the one above, but I realized that this approach wouldn’t get my the thinness of the metal curves that I need to achieve. So I went back in and drew them as curves instead of closed shapes. So when I extruded the curve and converted the result into polys it would look like a thin strip of metal. A lot of my floral detailing was accented with the soft select tool pinching the vertex together.
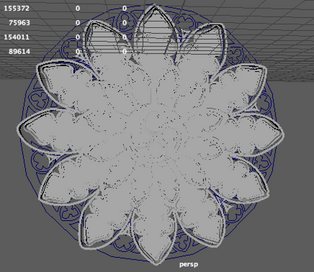
Circular Window: A mixture of both types of NURBS to Poly extrusion methods. A lot of the detailing is accented with the soft selection tool as well.


PART II, TEXTURING:
Collectively split assets to texture
Sara: Columns, Decorative Sconces, Organ, Hanging Lamps.
Blake: Textured all assets that were assigned for my modeling: (Second Floor Design Trim, Church Pews, Outer Doors, Inner Doors, Front Balcony Molding, Lower Floor Arches, Upper light fixtures, Lower Light Fixtures).
Carmen: Final Walls and floors, Ceiling tiles, Upper Windows.
Abby: I textured all of the assets I modeled save the hanging lamp. The stained glass was the most time consuming. I took a reference photo of the circular stained glass window numbered the sections and then used that as a key to number and texture the UV snapshots I had of the glass sections. This was achieved by quick selecting the sections of glass in the reference images we had and overlaying them filling in the sections that didn’t match up with solid color. The frame of the windows is based off of a smart material made by Sara so our colors are consistent. I made a smart material for the arches that I also shared with the group.
Specific Member Contributions:
Sara:
Column: I spent the most amount of time texturing on the column overall. I projected the high poly detail from my sculpted sections onto the low poly meshes I had made by baking maps in Substance Painter. Using the column, I also made a base smart material that was used throughout the scene on all the gray concrete material. I had also made a base wood smart material that I thought we would use throughout the scene, but didn’t end up using.
Decorative Sconces: I again projected my high poly detail onto the mesh by baking maps. I used the base smart material I made for the column and edited/added layers of grunge maps and smart maps.
Organ: This was the thing I spent the second most amount of time on. I matched the textures by repeatedly looking at the references and color-picking them. The base wood material I made for the columns I ended up using here and layering lots of other attributes on top. The brass I made by starting with the basic clean brass and layering dust and rust on top.
Hanging Lamp: By using a smart material of the arch wood texture that Abby made, I made a similarly colored material for the hanging lamp structure. For the light part, I made an emissive map and masked out where the “scrolly” detail was by stamping on a custom alpha I made from Photoshop.


Abby:
Arches: I created a smart material for the arches that was dark but had a greenish tint to it. I kept the material shiny but utilized the subtle scratches smart material to show wear.
Windows: I took Sara’s column smart material and modified it a bit to match the coloring and wear level for the frames of the windows. The glass itself was taken from reference photos that Carmen’s dad took for us and then layed onto UV Snapshots using a number key system that I drew out before I started reassigning the window designs.
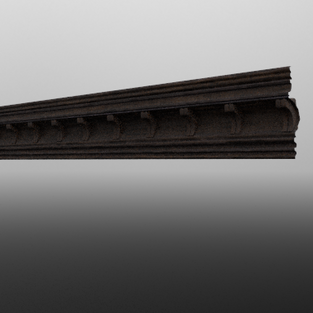
Moulding: Was a similar material to the Arch but I kept the wood grain and made it a richer brown.


Blake:
Outer Door: for the outer door, i created a smart metal by building off of a base iron and added a edge wear map to go based on curvature. this allowed for that scratched metal look. The wood was also a smart material created using a wood base and a generator map to get dirt and scruff. Also hand painted some color variation in the wood.
Inner Door: Similar Process, of using a wood and metal base and adding generators and grunge maps to make them more like the reference image. this door especially required painting in layers of color variation, especially reds.
Balcony: (also includes side parts and middle arches) The middle pew was created with a base wood, with not too much noise (the reference is a really smooth sleek material) then a custom smart material to add darker spots in the more receded parts of the wood. this smart material is used as a base for many of the other assets that are in the scene (first floor under arches, middle arches). The model is broken up into three pieces: the main middle part, the side part, and the standing arms of the balcony.
Roof Light: asset that's not seen much but decided to do anyways. Started from a base custom smart material that I made for a previous project and repurposed for this by tweaking the colors and roughness. simple texturing with metal outside trim and slight noise of the light dome.
Church Pew: the church pew had the most texturing, and was broken up into two parts: the middle seating, and the arms. The arms started from two different base wood layers. On top of that there is an edgewear map for “unvarnished areas”, as well as dirt in the crevices. There's also a lot of hand painted color variation going on in the trims of the wood as those are the lighter aspects. On the middle parts, the cushion is a fabric base with dirt around the edges. The Wood itself is built on the arm wood base, and has dirt where the crack of the seat is.
Light Fixtures: so there are actually two separate light fixtures that I ended up using the same procedural smart material on, which have edge wear metal scuffs, where the weathered areas would be and the light area itself would be emissive.
Under Arches: the under arches are the supports for the sides of the church and are a pretty straightforward material. they consist of a smart material re purposed from the balcony texture.


Carmen:
Walls: Using the concrete material previously used for the columns and large windows, I made a procedural brick texture for the inner walls of the church. Using this as a guide I masked out and drew some more unique brick shaping around the side doors, as they have interesting wall indents that conform the bricks to their shape. I also used a procedural material to create an older looking carpet for the floor
Ceiling tiles: I textured the moulding around the ceiling tiles to be the same wood material as that of the organ and balcony. They are also made of the same stone-like material as the walls.
Upper Windows: Made of the same wood material as before. The window panes themselves are a glowing glass shader. Using the photos my dad was able to take of the church, I took a low exposure photo of the stained glass and warped it to fit the UV’s of my windows, easily texturing them.


PART III, LIGHTING:
Abby and Blake: UE4
Specific Member Contributions:
Abby:
I created rectangle lights near the top set of windows to give the arches that harsh teal light. I increased the inner cone size of all of the lights that Blake put in and I increased the global light to give the entire room a well lit feel.
Blake:
For lighting, I was in charge of instancing the lights for where the wall lights would be and adding an emissive texture. Along with that I was tasked with adding an external light beneath, which was super straightforward from the reference. just trying to get the cone angle tweaked to match was the biggest challenge.


FINAL RENDER:
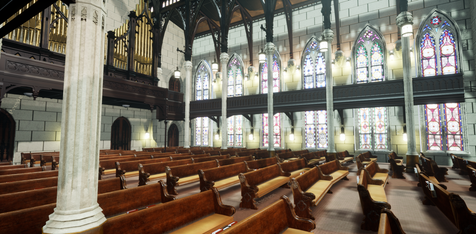

In the end we were able to recreate the historical monument Mt Vernon Place Church digitally in unreal and render with the sequencer, to deliver a video file.


Comments